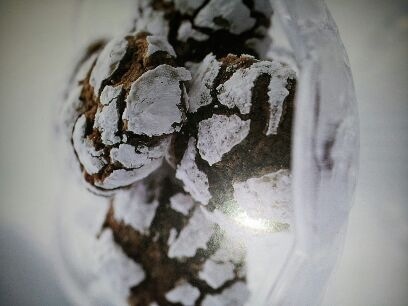
Easy Chocolate Balls

20131129-212013.jpg
I thought I would continue on with the Christmas theme, after all we are only 1 day out from it being December.
There are always plenty of social events we get invited to at this time of year. If you are like me you never like to arrive empty-handed when you are a guest. This recipe is one that can provide a solution to the question ‘what should I take?’. The beauty of ‘Easy Chocolate Balls’ is that they’ll keep in the fridge for a good month, so if your token gesture of kindness doesn’t get consumed straight away it doesn’t matter.
I made my first batch of ‘Easy Chocolate Balls’ last weekend (Zakidlets had their School Tableau Cake stall) and I’m quite sure they won’t be my last for the season.

You will need:
250g Arrowroot or Marie biscuits crushed
1 teaspoon of vanilla (If you want them to be Rum balls add 2 dessert spoons of rum instead)
395g tin sweetened condensed milk
3 dessert spoons cocoa sifted
1 cup desiccated coconut (reserve 1/2 cup for rolling chocolate balls in)

20131129-212127.jpg

Combine all ingredients in a bowl and mix until well combined (you will need your muscles at this point). Alternatively if you have a food processor that will fit all ingredients just pulse and blend until all ingredients are combined.
Roll mixture into balls to a size you like, I usually use a teaspoon of mixture as a guide for my Chocolate balls.
Roll in reserved coconut and place onto a foil or baking paper lined baking tray. Once all mixture is rolled place tray of chocolate balls into fridge to firm up. I usually leave them like this for at least 4 hours and then transfer them to an airtight container and keep in the fridge for up to 1 month if they last that long at your place!!

20131129-212236.jpg

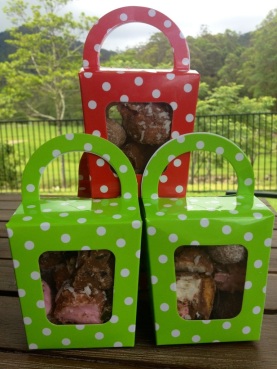
For a gift idea why not make a batch of my ‘Rocky Road’ as well as the ‘Easy Chocolate balls’ and combine them in some little gift boxes. Great for teachers, kids friend’s, work colleagues, everyone loves a bit of something homemade from the heart.

20131129-212409.jpg

Butterscotch Blondies

20131128-210835.jpg

Zagorgeous Cheryl from Tittle + Tat brought this recipe to my attention and boy oh boy am I glad she did. Cheryl found the recipe in issue 53 of Gathered by Mollie Makes.
The recipe is by Laura Mitchell, baker, creator blogger from Kit and Nancy.
If you have a sweet tooth then this recipe is definitely for you. Cheryl’s words were ‘They are so sinful, so much sugar, but oh so good!’. Cheryl thought they would be a great idea for Christmas presents in jars and I completely agree. Last year I made my ‘oaty choc chip cookies’presenting them in the same way, they were a great hit!
Yesterday was Blondie day. I was supposed to be dusting, vacuuming and mopping but knowing I had the ingredients in the cupboard to test this treasure out was just too tempting, I couldn’t help myself, I just had to bake. The good news for me is that I did manage to get the cleaning done too, JUST!!!!
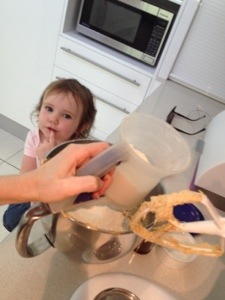
Below you’ll see my process of making these little delights. I do have to confess that in all the excitement of making them and a few distracted moments with Zatwo-year-old Alani I actually forgot to add the pecan nuts!!!! Whoops! Apparently that didn’t matter according to Zakidlets, but after sampling one myself I think the pecans would help to balance the flavours (or should I say sugars) that little bit more perfectly.

20131128-212202.jpg

20131128-212323.jpg

20131128-212346.jpg

20131128-212403.jpg

20131128-212422.jpg

Butterscotch Blondies

Ingredients:

2 ½ cups of plain flour
1 tsp baking powder
½ tsp salt
1 cup unsalted butter, softened (I prefer to use standard butter)
1 ¼ cups of light brown sugar
½ cup dark brown sugar
1 tsp vanilla extract
2 large eggs
1 cup toffee pieces (werthers Original chewy caramels)
chopped
2 or 3 cups of white choc bits
1 cup chopped pecans

Step One:
Preheat over to 180c
Grease and line a 25cm x 35cm brownie tin with baking paper (my tin was 16.5cm x 26cm x 3cm and still worked perfectly).
Beat the softened butter, sugar and vanilla until creamy with a hand mixer

Step Two: Beat in the eggs, one at a time and gradually add in the sifter flour, baking powder and salt.

Step Three:
Add the white chocolate, chopped caramels and pecans, stirring well

Step Four:
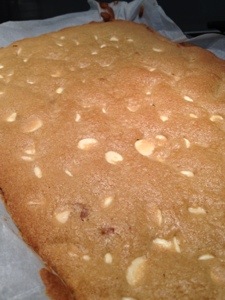
Spoon the mixture into the brownie tin and bake in the over for 35 minutes until golden brown.

The picture below is courtesy of the Zagorgeous Cheryl from incase you forgot Tittle+Tat. Cheryl bottled her Blondies up beautifully, they would make the perfect gift for that special teacher or friendly neighbour.
I would just like to say a special Thankyou to Cheryl for taking the time to share this fantastic recipe with me.

20131128-213126.jpg

Zakidlets most certainly enjoyed their afternoon tea yesterday of Butterscotch Blondies and Milk. I asked them to be judges and score them a mark out of 10, I’m still trying to work out Alani’s score!
We had fun regardless.

20131128-221738.jpg

My recent gift wrapping efforts

20131126-210114.jpg

I had a baby shower to go to recently and I wanted to get a bit pretty with some gift wrapping. I checked out a few images on-line for some inspiration and this is what I ended up creating.
To convert this to a Christmas theme just change the colour scheme.

You will need:
Brown wrapping paper
4 lengths of fine ribbon
Tissue paper
Twine
Scissors, Stapler, Craft glue.

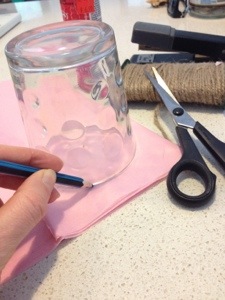
Start by wrapping your gift. Work out how large you would like to make your flower. I used a drinking glass as my tracing edge, with a diameter I thought would work well in relation to the size of my wrapped gift.
Make sure you have at least 10 layers of tissue paper. Trace your circle onto the tissue layers as shown.

20131126-210620.jpg

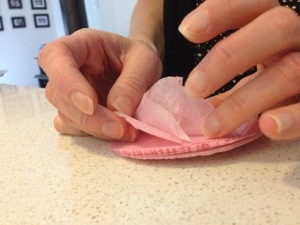
Cut your layers of tissue and double staple in the centre of your circle.

20131126-210730.jpg

Individually separate all the layers of tissue paper to create a full flower.

20131126-210915.jpg

20131126-211102.jpg

Tie a double knot in a piece of twine and trim so you are left with just the round little knotted ball. Create 3 of these.

20131126-211201.jpg

Glue in the centre of your paper flower.

20131126-211425.jpg

Grab your 4 strands of ribbon and tie them so they fit flush but not too tight around your gift. Take an extra little piece of ribbon and loop around the 4 pieces of ribbon, tying it off to gather your 4 strands of ribbon to a point as shown.

20131126-211533.jpg

Place a small bud of craft glue on the back of your paper flower and stick it down onto the join of ribbons.

Voila!!! You have yourself a pretty little gift wrapped with lots of love.

20131126-211559.jpg

Persian Love Cake

20131124-205852.jpg
I have 2 Zanewly wed friend’s Natalie and Dom who recently sparked my interest in a Persian Love Cake.
Natalie was working away from home a few weeks ago (I was lucky enough to catch up with her) and I noticed Dom had tagged Natalie to a picture of a Persian Love Cake cake posted on his FB page, he wrote with the picture ‘One slice is never enough’. Made me think that cake must be good, also made me think ‘Oh how romantic Mr Dom’, I think he was missing his beautiful bride and rightfully so. I kind of forgot about the cake for the week until Zagorgeous MIL Fiona came out to visit and reminded me of Dom’s Cake picture. I said right that’s it I have to find out what’s in it. That’s when I put good old Google to work and sure enough I got my recipe for a ‘Persian Love cake’. The recipe is by Gerard Yaxley and it was posted on Gourmet traveller. I read through the recipe, the ingredients sounded delicious, you really only have to say ‘sugar’and I’m there!! To give you a bit of insight on the ingredients we are talking raw sugar, almond meal, brown sugar, butter, yoghurt, nutmeg and eggs. I liked that the ingredients didn’t sound complicated and had the added bonus of being gluten free (not that I am but it is always handy to have a few GF recipes up your sleeve). Needless to say I added this little treasure to my list of ‘Must Bakes’.
Yesterday was baking project day and yes you guessed it ‘Persian Love Cake’ was on the menu in Zamama’s kitchen. You can find the recipe here.

Below you will see half the mixture pressed into the springform pan and half remaining in the bowl. When pressing base mixture’s into a pan I always find a flat bottomed glass does the job really well.

20131124-210554.jpg

I think you could easily use a narrower diameter in your springform pan especially if you want a cake with more depth then 2cm.

20131124-210713.jpg

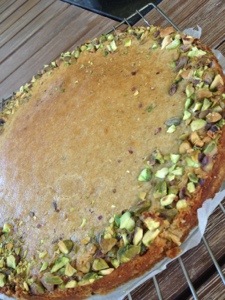
The cake cooked up really well with no complications, all you need to do is follow the instructions.
I did detour from the recipe just slightly in 2 ways. I only had dried nutmeg and I always like to use standard butter in my cooking rather then unsalted I find the regular butter balances out the flavours a little more.

20131124-210737.jpg
I am seriously thinking about putting it on my Christmas menu for dessert. I love baked cheesecakes and this little treasure reminds me of a cheesecake but with a bit of a spiced twist, you also get a little crunch from the raw sugar in the base but that just enhances the whole tasting experience. Give this recipe a whirl you won’t regret it.
Oh and you must serve it with the Greek Yoghurt the recipe suggests it balances the sweetness perfectly.
20131124-210752.jpg

Zamama’s Rocky Road

Rocky Road making in the Zamamabakes kitchen is a good sign it's getting close to Christmas. I love Christmas and everything it represents including celebrating the Birth of Jesus Christ, spending quality time with loved one's, and baking delicious treats!!!

Making Rocky Road at Christmas has become one of my traditions I think this year will be my 20th year for making it!
Zakidlets have their School Tableau this weekend so I thought I would put together some of the treats I love making at Christmas to donate to the famous cake stall.

Rocky Road (RR) is something you can adapt to your own tastes. The Zamama family are not big fans of glace cherries and other dried fruit varieties so I use mix in's that I know everyone in my family will enjoy including jelly snakes or green & red frogs (I sometimes find green frogs hard to find that's when I usually opt for the snakes as a back up), mixed nuts, crunchie bars, the all important marshmallow's and shredded coconut.
You also need to decide whether you want to use Dark, Milk or White chocolate, they will all work perfectly. I usually make a batch of Dark chocolate RR (that's Zadada's favourite) and a batch of Milk chocolate RR (that's Zakidlet's favourite).
It keeps in the fridge for a good 6 weeks if it lasts that long!

You will need:
450g Milk, Dark or White chocolate broken into individual pieces (I use Cadbury Chocolate).
120g mixed roasted nuts chopped
300g diced Allen's Snake's or red and green frogs.
2 x 250g pkts Pascall marshmallows
100g Cadbury Crunchies Chopped
1 Cup shredded coconut

20131122-212600.jpg

Line a pan 24cm x 30cm with baking paper.
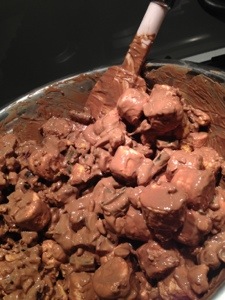
Place Chocolate in a glass or stainless bowl over a saucepan of not quite simmering water. Stir occasionally with a metal spoon until chocolate has melted completely. Add nuts, snakes, marshmallows and crunchies to melted chocolate and gently fold through.

20131122-212617.jpg

Tip chocolate mixture onto prepared tray and gently press into place so tray is filled evenly.

20131122-212637.jpg

20131122-212702.jpg

Sprinkle with shredded coconut, cover with foil and refrigerate 2-3 hours or until set.

20131122-212726.jpg

Cut up with a nice sharp knife (this will give you a good work out) into bite size portions. Store in an airtight container in the fridge.
Yummy, Yummy, Yummy.
Hope you all enjoy!!!!!

PS- A useful tip, when melting the chocolate don’t let the water in the saucepan underneath touch the bottom of the bowl containing the chocolate, this helps to keep chocolate silky and smooth while its melting.

20131122-212829.jpg

Oven baked risotto with chicken and chorizo

20131121-164916.jpg

Zacousin Michael supplied me with the goods for this fantastic recipe. Like myself Michael enjoys collecting recipe clippings, but he was unable to remember which magazine this recipe came from. From now on when I tear out a recipe from a magazine or newspaper I am going to write down on the back of it where I found it so I can give the source the credit they deserve. I am guessing this recipe may have come from a New Idea or Woman’s day because they always have fantastic recipe’s in them.
When I served this up on Tuesday night Blake our little boy virtually inhaled it, that is always a good sign, I feel like I blink sometimes and his plate is empty!! Ella enjoyed it too but at a slightly more ladylike pace. Alani the 2-year-old mmmmmm yes well at the moment unless it’s spaghetti bol or fish and chips I can pretty much guarantee her reaction of ‘I don’t want this’,(sigh), a challenge we are trying to deal with at the moment, but that’s a whole other story!!
Now Getting back to this risotto recipe I will give you the basic recipe as I was given and then I will tell you what substitutions I made. It is a very flexible recipe as you will see.

20131121-165342.jpg

You will need:
1 litre chicken stock
1 Tablespoon extra virgin olive oil
3(400g) chorizo sausages, sliced thinly
400g chicken thigh fillets cut into 2 cm pieces
2 Large(400g) brown onions, chopped
2 cloves garlic, chopped finely
1 large(300g) red capsicum, sliced thinly
2 cups(400g) Arborio rice
2 teaspoons smoked paprika
3/4 cup dry white wine
1/2 cup coarsely chopped flat-leaf parsley

How to:
1 Preheat oven to 180c (160c fan-forced)
2 Bring stock to a gentle simmer in a medium saucepan
3 Meanwhile, heat half the oil in a flameproof dish over a high heat. Add chorizo, cook until browned all over. Remove from dish, cover to keep warm. Discard all but 1 tablespoon of fat from the dish.
4 Add chicken to same dish, cook stirring until browned all over. Remove from dish.
5 Heat remaining oil in same dish, cook onion and garlic, stirring until soft. Add capsicum, cook, stirring for 1 minute. Add rice and paprika, stir to coat in onion mixture. Add wine, simmer, uncovered, until liquid has evaporated. Add the hot stock and chicken, cover with lid. Cook in oven for about 25 minutes or until liquid is absorbed and rice is tender. Stir once halfway during cooking. Return chorizo to the dish, stir until heated through.
6 Sprinkle with parsley and serve with parmesan, if desired.

SUITABLE TO FREEZE

NOTE: If you don’t have a flameproof dish with a lid, start the mixture in a frying pan on the stove, then transfer it to an ovenproof dish with lid (or you can just firmly cover dish with foil if you don’t have a lid).

SUBSTITUTIONS I MADE (whenever I can manage it I try to get as many veggies into a dish so I know the kids are getting the most out of a tasty meal).
1 I only used half an onion as I don’t like a lot of onion, but added 3/4 cup mushrooms instead.
2 I didn’t use Capsicum, instead I used 1 small zucchini, and carrot diced finely.
I also added 1 cup of fresh baby spinach leaves mixed through at the same step as the chorizo sausage.

This dish served us for 2 nights running, great for a work night when you can just reheat leftovers. Blake asked me last night if there was anymore of that nice rice left, he was obviously prepared to eat it 3 nights running! I’ll take that as a compliment.

I will be putting this dish on the rotating meal plan hahahaha….I wish I was that organised!!! It’s definitely on the favourites list for a repeat appearance.
Thanks Michael, I love using recipes that are tried and tested!!!

Carrot Quinoa cake

20131119-204026.jpg

It was Zadada that provided me with the idea of seeking a carrot cake recipe that incorporated quinoa. Where does one usually look first? Well for me and I think for most it’s taste.com.
Jackpot!!! I found what I was looking for and the recipe well and truelly delivered!! Sunday was my cooking day. This cake is beautifully moist, the quinoa adds a depth of extra texture and satisfies ones appetite very well. Sadly I have to say we finished off the last slice last night!! The good news is that gives me a great excuse to move onto my next baking adventure which at this point will be some treats to donate to our School tableau cake stall this weekend!! But for now it’s back to the quinoa carrot cake.

I did 2 things different then the recipe suggests, first I added 1/2 cup finely chopped dates to the cake at the same time you add the grated carrot. The 2nd detour was for the icing. I made 1 quantity of lemon
vienna cream icing instead of the cream cheese icing but you please yourself. NOTE: instead of using 2 Tablespoons of milk work with 2 tablespoons of freshly squeezed lemon juice adding gradually as you may not need it all.
Click here for this amazing cake recipe.

href=”https://zamamabakes.files.wordpress.com/2013/11/20131119-204136.jpg”;20131119-204136.jpg

You can see how delicious this cake looks and it eats just as well. It’s definitely a keeper!!
If you end up with left over quinoa why not make a salad like I did here.

Hope you enjoy it as much as our family has.

href=”https://zamamabakes.files.wordpress.com/2013/11/20131119-204218.jpg”;20131119-204218.jpg

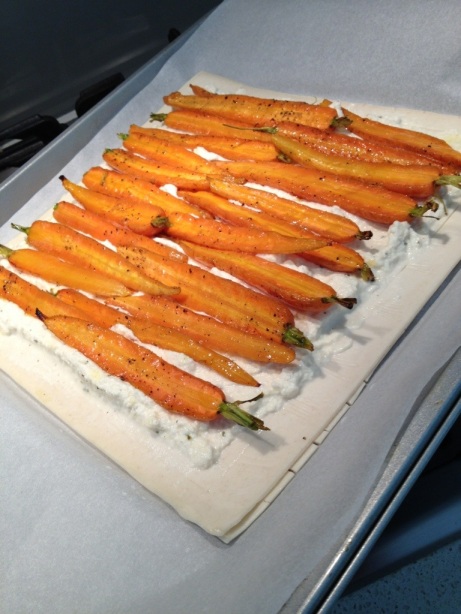
Carrot galette with a side of quinoa salad

When I was wading my way through my pile of recipe clippings last week this was one that caught my attention, mind you it doesn’t take much for an unattempted recipe to draw me in!
From memory the recipe was one I tore out of a free Coles supermarket food magazine (you know the one’s they giveaway at the checkout for each season), just don’t ask me which year or season!
I made sure I got the ingredients I needed during the week (well so I thought) in hope that I may just get the chance to make it for lunch sometime over the weekend. It just so happened I found a window of opportunity on Sunday and because I also made a carrot and quinoa cake resulting in leftover quinoa, I decided rather than waste it I would make a salad to go with the galette. I’m hoping to get the Carrot and Quinoa cake up on a post for tomorrow!! Anyway…..

You will need:
1 bunch Dutch Carrots
olive oil spray (I just used normal olive oil)
375g block frozen puff pastry, thawed (I used 2 sheets of ready-made puff pastry and joined them by brushing milk on first sheet then placed 2nd sheet on top).
300g ricotta cheese
1 tablespoon finely grated lemon zest
1 tablespoon finely chopped oregano (I just used dry herbs, I actually used masterfoods greek seasoning)

Preheat oven to 200c or 180c fan.Line a baking tray with non-stick baking paper. Scrub carrots and trim the leafy tops. Carefully cut each carrot in half, lengthways. Arrange in a single layer on tray and spray or drizzle lightly with oil. Roast 10-15 minutes until just tender, cool.
Prepare another baking tray lined with baking paper.
Roll out pastry to about 5mm thick (or alternatively lay 2 sheets of ready-made puff pastry on top of each other, brushing first piece of pastry with milk before adding the 2nd on top). Place prepared pastry on baking tray.
Score a line around the edge of pastry, about 2cm from edge, to create a border,and prick the area inside the line all over with a fork. Combine ricotta, zest and oregano in a bowl and season. Spread over the pastry within the line. Arrange carrots over ricotta mixture.

20131118-211509.jpg

Place into oven and cook for 20-25 minutes (err on the side of caution in my oven 15 minutes would have been better mine burned a little), until pastry is crisp and golden brown. Serve warm.

20131118-211913.jpg

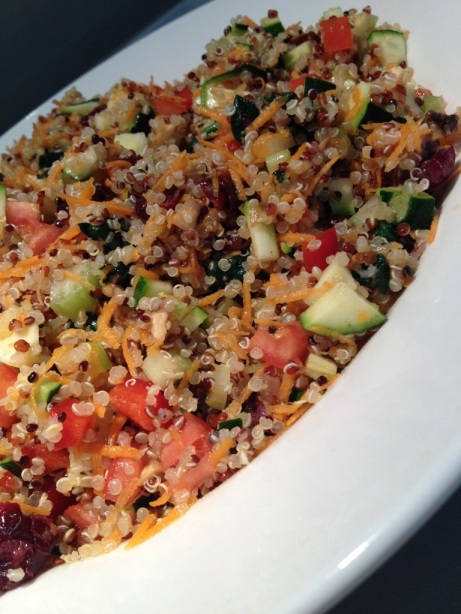
As for the Quinoa Salad just use my Easy Brown Rice salad recipe here and substitute Quinoa for the rice.

20131118-212120.jpg

The result a delicious, reasonably healthy lunch. I finished my carrot gallette with a drizzle of Simply stirred Caramelised Balsamic Dressing from Tweed fruit exchange it was delicious.

20131118-212231.jpg

Jennifer’s Crackle Cookie Discovery

20131116-124620.jpg
ZaGorgeous Jennifer has been baking and sharing with me again, she is such a gem!!
Jennifer’s husband Glenn actually picked out this recipe from her 50c (fete find) ‘sweet food’ recipe book.
Jennifer said she was a little sceptical of the recipe at first but reports after baking these ‘tasty little morsels’ they were a fantastic success, husband Glenn thoroughly enjoyed one with a serve of ice cream and their 3 kidlets loved them too!!! Yum!!! My mouth is watering already!!!
So without further adieu here is the recipe!

Crackle Cookies

125g butter

2 cups brown sugar

1 teas vanilla

2 eggs

60g dark chocolate, melted

1/3 cup milk

2 3/4 cups plain flour

2 tbls cocoa

2 teas baking powder

1/4 teas allspice

2/3 cup chopped pecans

icing sugar to coat

Method:

1. Grease and line 2 baking trays. Beat the butter, sugar and vanilla until creamy.

2. Beat in the eggs one at a time.

3. Stir the chocolate and milk into the butter mixture.

4. Add sifted flour, cocoa, baking powder and allspice, and a pinch of salt into the butter mix. Stir and add pecans .

5. Refrigerate the mixture for AT LEAST 3 HOURS or overnight.

6. Preheat oven to 180 degrees. Roll tablespoons of the mixture into balls, then roll to coat in icing sugar.

7. Place well apart on trays. Bake for 20 mins. Leave for 3-4 mins then cool on a wire rack.

Enjoy!!!!

Baking a Savoury Scroll with Zakidlets

P1090805
I found this recipe during the week while trying to put some order into the recipe clippings I have been collecting over the years. Finally I have started to sort them into a kind of categorical order?? (I think its going to be a bit of a Zamama work-in-progress sort of project!!). Anyway with it being the weekend and it WAS raining outside, I thought this might be a great little baking project to involve Zakidlets with.
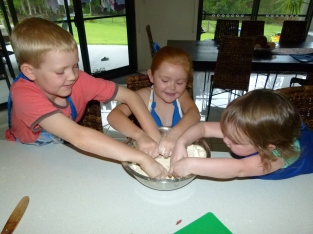
I certainly did not get any arguments when I asked Zakidlets if they would like to help me do some baking!! As you can see below they thoroughly enjoyed getting their little hands in amongst rubbing the butter into the flour.

P1090783 P1090784 P1090785
You will need
2 cups self-raising flour
30g butter chopped
1/4 cup basil (I didn’t have fresh basil so used a heaped teaspoon of dried)
3/4 cup milk
3 tablespoons pizza paste or similar
1 cup tasty cheese
1/2 cup chopped salami
1/2 cup red capsicum, diced
1/3 cup diced black olives (regarding toppings it’s up to the imagination ie sun-dried tomatoes, artichoke, spinach, feta, sultanas, apple and cinnamon, the choice is yours)

P1090786 P1090790 P1090791
Preheat oven to 220c
Rub butter into flour (3 sets of hands is fun but 1 set will still do the job).
Make a well in the middle, pour milk in stirring quickly to make a very sticky dough (don’t over mix).
Flour bench top well. Knead dough until not sticky and easy to work with.
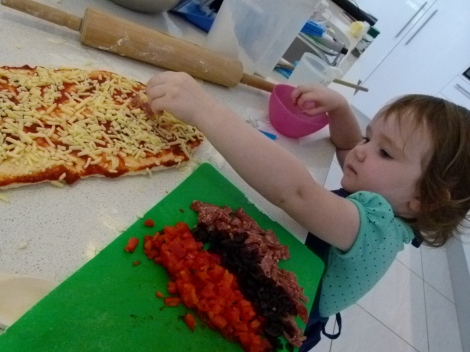
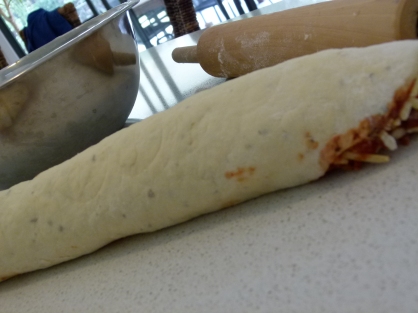
Roll dough out to about 1.5 cm thick rectangle. Load toppings over the dough and roll length ways into a log shape. Cut into 2cm slices.
Place on a baking tray lined with baking paper in the shape of a ring cut side up so all edges touch. Brush with milk. Bake 15 minutes until just brown and sounds hollow when tapped on.
P1090808
The hard work was a rewarding, warm yummy savoury scroll!!!
Enjoy!!!